Showing posts with label Apache Spark. Show all posts

Mar 5, 2018

Some Lessons of Spark and Memory Issues on EMR

In the last few days we went through several perfomrance issues with spark as data grow dramaticaly. The easiest way to go around might be increasing the instance sizes. However, as scaling up is not a scalable strategy, we were looking for alternate ways to back to track, as one of our Spark/Scala based pipelines strarted to crash.

Some Details About Our Process
We run a Scala (2.1) based job on a Spark 2.2.0/EMR 5.9.0 cluster w/ 64 r3.xlarge nodes.
The job analyzes several data sources each of few houndred GB (and growing) using the dataframe API and output data to S3 using ORC format. 

How Did We Recover?
Analyzing the logs of the crashed cluster resulted w/ the following error:

WARN TaskSetManager: Lost task 49.2 in stage 6.0 (TID xxx, xxx.xxx.xxx.compute.internal): ExecutorLostFailure (executor 16 exited caused by one of the running tasks) Reason: Container killed by YARN for exceeding memory limits. 10.4 GB of 10.4 GB physical memory used. Consider boosting spark.yarn.executor.memoryOverhead.

Setting the spark.yarn.executor.memoryOverhead to 2500 (the maximum on the instance type we used r3.xlarge) did not make a major change.

spark-submit --deploy-mode cluster --conf spark.yarn.executor.memoryOverhead=2500 ...

We raised the bar by disabling the virtual and physical memory checks and increasing the virtual to physical memory ratio to 4 (This is done step 1: Software and Steps of EMR creation by setting the following value of Edit software settings)
[
{"classification":"spark","properties":{"maximizeResourceAllocation":"true"}},{"classification":"yarn-site","properties":{" yarn.nodemanager.vmem-pmem-ratio":"4","yarn.nodemanager.pmem-check-enabled":"false","yarn.nodemanager.vmem-check-enabled":"false"}}
]

However, this made the magic till hitting the next limit (probably spark tasks were killed when they trying to abuse the physical memory) with the following error:

ExecutorLostFailure (executor  exited caused by one of the running tasks) Reason: Container marked as failed: container_ on host:. Exit status: -100. Diagnostics: Container released on a *lost* node 

This one was solved  by increasing the number of dataframe partitions (in this case from 1024 to 2048), that reduced the needed memory per partition.

Note: if you want to change dataframe default partitions number (200) use the following:
setConf("spark.sql.shuffle.partitions", partitions.toString)
setConf("spark.default.parallelism", partitions.toString)

If you want to take another look on the default partitioning and how to automate the numbers, take a look at Romi Kuntsman's lecture.

Right now, we run in full power ahead. yet when we may hit the next limit, it may worth an update.

Bottom Line
As Spark heavily utilizes cluster RAM as an effective way to maximize speed, it is highly important to monitor it and verify your cluster settings and partitioning strategy meet your growing data needs.

Keep Performing,
Moshe Kaplan

Nov 28, 2016

Optimizing Your Spark Cluster for Various Scenarios

Given a defined scenario for your system, how can you meet requirements?

Asking for more machines, memory and cores is always a valid idea, but your CFO may not agree and may decline your request.

"Know Your Data"
As Demi Ben Ari says: "know your data" is the answer.
You must understand your business needs to get more from your cluster.
By understading your needs you will be able to run more tasks faster.

Moreover, if you utilize cloud computing resources such as AWS, better understanding will let you select the right type of instances and getting more for same money (or even less as we will see next)

What can be controlled?
In this post, I will focus on YARN based clusters, but concepts can be applied to Mesos and stand alone clusters as well. Some more information can be found as well at Cloudera post.

How Many Nodes Do I Have?
Take a look at the number of servers installed w/ NodeManagers. This is the number of nodes you can spin (in this case we actually have 4, although there are total 8 YARN clients installed).
A node is an actual physical or virtual server (depends on your environment)

Define YARN Limitations:
yarn.nodemanager.resource.memory-mb: 
Total memory on a single node used by all executors 
(NodeMemInGB - 1)*1024

yarn.nodemanager.resource.cpu-vcores:
Total cores on a single node used by all executors
(NodeCores - 1)


Define Spark Executors Balancing
--executor-cores / spark.executor.cores: 
The number of cores per executor (number of tasks executor can run).

--executor-memory / spark.executor.memory: 
The executor memory (Actual upper limit is 64GB due to GC).
To which spark.yarn.executor.memoryOverhead will be added (default to max(384, .07 * spark.executor.memory))

Application master also requires default of 1GB and 1 core that runs on the driver and therefore we'll always decrease a single core and 1GB in our calculations. These can be controlled by the following parameters:
  --driver-memory

  --driver-cores

--num-executors / spark.executor.instances: 
The number of executors for a single job
Can be avoided using spark.dynamicAllocation.enabled

The massive interactive small data scenario
This is not a common scenario, but some people may want to run large number of tasks on relative small data.
This might not be the best practice for a Big Data, but it will provide us a good understanding of Spark cluster sizing based on this edge case.

We'll start w/ a default 4 nodes m4.xlarge 4 vCores, 16GB (on demand cost $0.239/hour of $717/month)

1. First we will maximize the resources for any given node:
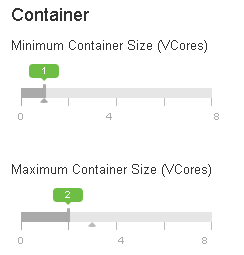
yarn.nodemanager.resource.memory-mb: (16-1)*1024 = 15,360MB
Memory Before and After

yarn.nodemanager.resource.cpu-vcores: (4-1) = 3 vCores

CPU Before and after

Containers Before and After
2. Then we will maximize the number of executors, by minimize the number of cores per executor to 1
spark.executor.cores: 1
spark.executor.memory: (16-1)*(1-0.07)/3 = 4
spark.executor.instances: 3/1*4nodes = 12 executors

The Results
After finishing configuration, we enabled 12 tasks that run 24x7 using a manual schedualer written in our lab.
As you can see number actually fit our design: CPU jumps and hits the 100%, while cluster remain stable and not crushes.


The cluster utliliuzation jump after conifiguration to 12 executors and running 8 tasks every minute


The cluster utilization hits 100% CPU w/ 11 tasks every minute


Optimizing the Instance Types
Since our bottleneck is CPU vCores, by knowing our data we should seek another type of AWS instance. c3.2xlarge is an acutal match as the C3/4 series is optimized to provide more CPU and cores for less money (a c4.2xlarge instance has w/ 8 vCores and 15GB at $0.419/hour, so for $629/month we'll get 2 c4.2xlarge nodes).

1. First we will maximize the resources for any given node:
yarn.nodemanager.resource.memory-mb: (15-1)*1024 = 14,336MB
yarn.nodemanager.resource.cpu-vcores: (8-1) = 7 vCores

2. Then we will maximize the number of executors, by minimize the number of cores per executor to 1
spark.executor.cores: 1
spark.executor.memory: (15-1)*(1-0.07)/7 = 1
spark.executor.instances: 7/1*2nodes = 14 executors

Bottom Line
With some little tweeking, we could get 17% more exectores for 12% less money, or bottom line of 33% more value/money!

Keep Performing,
Moshe Kaplan

P.S You should explore more ways to save money on this kind of architrecture by utilizing:
 - Reserve instacnes
 - Spot instances

Feb 25, 2016

Spark, Python and Windows

Yetxtit may not be common, but if you want a quick start for a Windows guy on the hotest Big Data platform around, you will find this tutorial relevant for you:

Get the Needed Prerequistes Software
git (for building Spark)
http://git-scm.com/download/win
Install and verify git was added to your path

Python 3.5.1
https://www.python.org/ftp/python/3.5.1/python-3.5.1-amd64.exe
Or even better, try the Anaconda version

Define Java
Get Java 8 (Oracle JDK):
http://www.oracle.com/technetwork/java/javase/downloads/jdk8-downloads-2133151.html

Set JAVA_HOME environment variable to c:\Program Files\Java\jdk1.8.0_73\ (don't use double quotes if you are used to it)

Prepare SBT
Get SBT 0.13.11 (for building spark compilation)
https://dl.bintray.com/sbt/native-packages/sbt/0.13.11.2/sbt-0.13.11.2.msi

Spark build is huge, therefore we need to increase the memory limit of the sbt from 256MB to something larger (2048MB for example, but saw some cases where 6GB were needed). This can be performed by modify the sbt runner file (C:\Program Files (x86)\sbt\bin\sbt.bat):
"%_JAVACMD%" %_JAVA_OPTS% %SBT_OPTS% -Xmx2048m -Xms2048m -cp "%SBT_HOME%sbt-launch.jar" xsbt.boot.Boot %*

Or better, change these settings at C:\Program Files (x86)\sbt\conf\sbtconfig.txt

Buid Spark
Download Spark 1.6 (No need to intall now, see details below)
http://www.apache.org/dyn/closer.lua/spark/spark-1.6.0/spark-1.6.0.tgz
  1. Extract the source using 7zip (or anything else that can use tgz files) for example to C:\Spark
  2. Build spark:
    1. cd C:\Spark
    2. "c:\Program Files (x86)\sbt\bin\sbt.bat" package
    3. "c:\Program Files (x86)\sbt\bin\sbt.bat" assembly
Get Winutils
Create Hadoop folder (for example c:\hadoop)
Define HADOOP_HOME environment variable (c:\hadoop)
Download to c:\hadoop\bin the winutils.exe file

Run It Like a Pro
Create a test file c:\spark\verify.txt and enter to it the following text: this is a trial
Run pyspark:
> c:\spark\bin\pyspark
In pyspark enter the following code:
text_file = sc.textFile("file://c:/spark/verify.txt")
text_file.collect()
The file should be printed

Keep Performing,
Moshe Kaplan

May 30, 2015

1 Click from Code to Prod: Spark, Scala, sbt, Intellij and Hadoop

You will probably will find dozens of Q&A articles how to create a new scala project using Intellij and submit it to a remote Hadoop based Spark cluster. However, none of them is actually complete and shows the full picture.
This post is going to save you a lot of time, so stay tuned...

Expected Outcome: an environment that will let you in one click move from coding your Scala to submitting it to a remote YARN based Spark cluster.

Note: some issues like "no spaces" may be overcome using double quotes or other methods, but we recommend you to follow the process and make it the simple way to avoid unexpected outcomes.

Prerequisites 
  1. Install JDK. Make sure JDK is placed in a folder w/o spaces (for example C:\Java)
  2. Configure the JAVA_HOME environment variable to you installation location
  3. Download and install the latest Intellij IDE
  4. Install the Intellij Scala plugin
  5. Download and install scala. Again make sure scala is placed in a folder w/o spaces (for example C:\scala)
  6. Set the environment variable for Scala
  7. Download and install sbt 0.13.8. Again make sure sbt is placed in a folder w/o spaces (for example C:\sbt)
  8. Add the sbt folder to the PATH environment variable
  9. In windows, you will need 1) to download winutils.exe; 2) create Hadoop folder; 3) and2) place in a bin folder inside a in order to avoid the following error:
    Failed to locate the winutils binary in the hadoop binary path
    java.io.IOException: Could not locate executable null\bin\winutils.exe in the Hadoop binaries.
  10. If your environment is connected to the internet using a proxy add the following proxy parameter of both HTTP and HTTPS to the JAVA_OPTIONS environment variable:
    -Dhttp.proxyHost=yourcache.com -Dhttp.proxyPort=8080 -Dhttps.proxyHost=yourcache.com -Dhttps.proxyPort=8080
Note: when working w/ Intellij, consider using the early access program for quick fixes especially in a dynamic environment like Scala and Spark

Create the Initial Project
  1. Create a new Scala (and not an sbt on) project in Intellij
  2. Select the right JDK version (based on the installation you made before)
  3. Select the right Scala SDK to match the cluster (see below): click on create and select the right one (or click on download and get it):
Create the Basic Project Files
This should be done in the file system and not inside the Intellij IDE to avoid surprises.
  1. Create a build.sbt file in the project root. Please notice:

    1. Matching the Spark client and cluster versions.
    2. Matching the Hadoop client and cluster versions.
    3. Matching the Scala and Spark version by looking for the spark-core package in Maven Central. In our case you should look for the spark cluster version (1.2.0) and then get the matching Scala version (2.10) from the ArtifactId. The minor version can be found in the Scala site.

      The various Spark-core versions and matching the Spark and Scala versions
    4. Adding the "provided" keyword to the library dependencies in order to avoid jar clashes when building the project:
      [error] (*:assembly) deduplicate: different file contents found in the following:
      [error] \.ivy2\cache\javax.activation\activation\jars\activation-1.1.jar:javax/activation/ActivationDataFlavor.class
      [error] \.ivy2\cache\org.eclipse.jetty.orbit\javax.activation\orbits\javax.activation-1.1.0.v201105071233.jar:javax/activation/ActivationDataFlavor.class
    5. Not using the provided key: in order to avoid cases where sbt assembly run correctly, but actually the make (or sbt run) does not, you should include the following reincluding in your build.sbt (and not in your assembly.sbt): run in Compile <<= Defaults.runTask(fullClasspath in Compile, mainClass in (Compile, run), runner in (Compile, run))
    6. Exclude javax.servlet file to avoid the following errors:
      [error] (run-main-0) java.lang.SecurityException: class "javax.servlet.FilterRegistration"'s signer information does not match signer information of other classes in the same package
      java.lang.SecurityException: class "javax.servlet.FilterRegistration"'s signer information does not match signer information of other classes in the same package
    7.         at java.lang.ClassLoader.checkCerts(ClassLoader.java:895)
    8.         at java.lang.ClassLoader.preDefineClass(ClassLoader.java:665)
    9.         at java.lang.ClassLoader.defineClass(ClassLoader.java:758)
    10. Keeping a spaced line between each two lines.
    11. From the command line in the project root run: 
      1. sbt
      2. sbt update
      3. sbt assembly
      4. sbt run
    12. If you get during running the following exception, do worry, it is just a cleanup issue and you can disregard it:
      ERROR Utils: Uncaught exception in thread SparkListenerBus
      java.lang.InterruptedException
              at
      java.util.concurrent.locks.AbstractQueuedSynchronizer.doAcquireSharedInterru
      tibly(AbstractQueuedSynchronizer.java:998)
              at java.util.concurrent.locks.AbstractQueuedSynchronizer.acquireSharedInterruptibly(AbstractQueuedSynchronizer.java:1304)
  2. Create a /project/assembly.sbt file and run sbt assembly to verify the project jar is being created: sbt assembly. Using this you will be able to avoid:
    [error] Not a valid command: assembly
    [error] Not a valid project ID: assembly
    [error] Not a valid configuration: assembly
    [error] Not a valid key: assembly
    [error] assembly
  3. Create a /main/scala/SimpleApp.scala file (or any other original name for your project main file). Please notice to include
    1. The spark conf should include your spark master that will serve your jar using setMaster, in order to avoid the following error:
      "A master URL must be set in your configuration"
    2. If you have limited resources (and you will have), configure the number of used cores and the allocated memory per core.
    3. The path where your compiled jar is located using setJars. After building your project in the first time you will be able to find it inside the target folder in your project. If you want configure setJars, you will get messages that Spark cannot find your Jar
The /build.sbt file:
name := "SimpleApp"

scalaVersion := "2.10.4"

run in Compile <<= Defaults.runTask(fullClasspath in Compile, mainClass in (Compile, run), runner in (Compile, run))

libraryDependencies += "org.apache.hadoop" % "hadoop-client" % "2.5.0" % "provided" excludeAll ExclusionRule(organization = "javax.servlet")

libraryDependencies += "org.apache.hadoop" % "hadoop-hdfs" % "2.5.0" % "provided" excludeAll ExclusionRule(organization = "javax.servlet")

libraryDependencies += "org.apache.spark" %% "spark-core" % "1.2.0" % "provided"

The /project/assembly.sbt file:
addSbtPlugin("com.eed3si9n" % "sbt-assembly" % "0.13.0")

The /main/scala/SimpleApp.scala file:
import org.apache.spark.SparkContext
import org.apache.spark.SparkContext._
import org.apache.spark.SparkConf

object SimpleApp {
  def main(args: Array[String]) {
    val logFile = "hdfs://hadoop.name.node:8020/tmp/POC/*" 
    val conf = new SparkConf()
        .setAppName("Simple Application")
        .setMaster("spark://spark.master.node:7077")
        .set("spark.executor.memory", "64m")
        .set("spark.cores.max", "4")
        .setJars(List("/path/to/target/scala-2.10/SimpleApp-assembly-0.1-SNAPSHOT.jar"))
    val sc = new SparkContext(conf)
    val logData = sc.textFile(logFile, 2).cache()
    val numAs = logData.filter(line => line.contains("a")).count()
    val numBs = logData.filter(line => line.contains("b")).count()
    println("Lines with a: %s, Lines with b: %s".format(numAs, numBs))
  }
}

Arrange the IDE and Submit your First Job
  1. Create a new configuration.
  2. Add sbt assembly to "the before launch" configuration in order to generate a jar file:
    1. Add a new task to the "Before Launch"
    2. Add a new external tool
    3. Set the sbt location in the program and "assembly" in parameters
Bottom Line
It may take a little time to launch a proper Scala and Spark configuration in Intellij, but the result worths it!

Keep Performing,
Moshe Kaplan

    Nov 22, 2014

    Analyzing Twitter Streams in Real Time using Spark

    One of the most interesting (and some people say not working) features in Apache Spark is the ability to analyze the Twitter stream in real time.

    DZone just released earlier this week the new Spark RefCard. Since I made a peer review of it, it is a good time to discuss this topic.

    Tuning an Out of a Box Solution
    Spark provides an out of the box example that with some tuning, you will get the top ten trending Twitter tags every 10 and 60 seconds.

    1. Create a new Twitter App or use your existing app credentials at Twitter Apps.
    2. Download and install Java, Scala and Spark
    3. Adjust the environment variables :
      1. Scala home
        export SCALA_HOME=/usr/lib/scala
      2. PATH to run scala
        export PATH=$PATH:$SCALA_HOME/bin
      3. Add the location of spark-streaming-twitter_2.10-1.0.0.jar,  twitter4j-core-3.0.3.jar and twitter4j-stream-3.0.3.jar to CLASSPATH
        export CLASSPATH=$CLASSPATH:/root/spark/lib/twitter4j/
    4. Run the code after tuning some parameters:
      1. Get into the spark foldercd /var/lib/spark/spark-1.0.1/
      2. If you are running on a single core machine (or you want to just make sure you will get results and not just "WARN BlockManager: Block input-0-XXXXXXXX already exists on this machine; not re-adding it") change the ./bin/run-example code:
        sudo sed -i 's/local\[\*\]/local\[2\]/g' *.txt
      3. Run the example (please remember that you should write the class name, including the streaming., and avoid placing the path, the scala extension or any other fancy stuff:sudo ./bin/run-example streaming.TwitterPopularTags 
    5. The result will be shown after several seconds:Popular topics in last 60 seconds (194 total):
      #MTVStars (42 tweets)
      #NashsNewVideo (9 tweets)
      #IShipKarma (6 tweets)
      #SledgehammerSaturday (6 tweets)
      #NoKiam (5 tweets)
      #mufc's (3 tweets)
      #gameinsight (3 tweets)

    Bottom Line
    Spark is an amazing platform, with some little adjustments you will be able to enjoy it in a few minutes 

    Keep Performing,
    Moshe Kaplan

    ShareThis

    Intense Debate Comments

    Ratings and Recommendations